The MIDI Laser Piano
So back in 2015, I played about with cymatics (a way of mixing physics and music through visualization). The results were great, but it didn't really impress a crowd, my setup was far from perfect. Disgruntled by this, I set out to design a completely new device that visualized music and looked impressive to a viewer. Something I could show to a crowd.
And so I present to you, the Laser Piano™. The Laser Piano is a device I have came up with that is simply a bank of 88 lasers connected to an Arduino connected to a computer. Since there are 88 keys on a standard keyboard/piano, there is one laser for each MIDI note. I have programmed the device so that a user can play a MIDI keyboard and the note pattern will be reproduced in the lasers. However, the real show starts when you play a full MIDI song file from the computer (especially one of those impossible Synthesia songs that have hundreds of note changes a second!)
To top it all off, when the device is used in a dark room, the smoke machine I have built (see previous post) can be used to make the entire beam of all 88 laser clearly visible. This system coupled up with some catchy, well known and out right fast MIDI tunes through a 5.1 surround sound speaker system and a crowd makes for a prismatic overture!
I started this at the end of 2016 and have only just finished it (this summer literally has been just me finishing old projects xD) At the end of the day, I'm really happy with how this turned out. It works, looks amazing and is something I cant wait to show anyone who visits the lab, especially people who like music. And of course, I designed this myself and as far as I'm aware, there is nothing else like it out there making this one of the few projects completely devised by me, and not something I've recreated which makes me quite proud of it.
In this youtube video, I showcase the hardware of the system, how it works, and how I got the idea to make it as well as some demo footage of it working. In later videos, I will post entire songs played through it with proper sound editing and better lighting. If anyone has a song they would like to see played through it (or a MIDI file), just write a comment and I will be sure to make it happen.
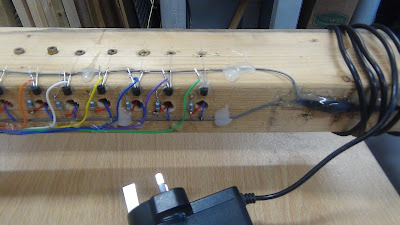
The electronics behind this project is simple. The difficult part was that every component had to be glued and soldered 88 times, once for each laser! This took a long time but the main damage was not to my sanity, but to my wire supply. Hopefully the pictures illustrate just how much wire was required.
Testing the shift register library:
Testing the shift register library:
Here is how far I got in 2016 when I started the project before I ran out of lasers.
A little bit of hot glue and cable ties were required for cable management.
For now, enjoy the video and stay tuned for at least 10 videos showing at least 10 songs being played through the Laser Piano. These should be released in a few week time.


